How to Draw a Gaming Chair Step by Step: A Tutorial
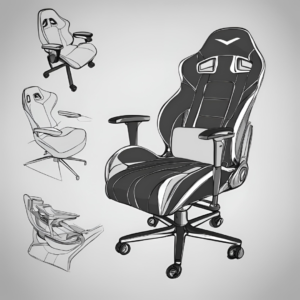
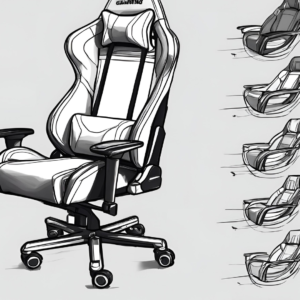
Are you an aspiring artist or a gaming enthusiast looking to capture the essence of your favorite gaming setup on paper? Learning how to draw a gaming chair step by step can be an exciting and rewarding experience. In this comprehensive guide, we’ll walk you through the process of creating a realistic and visually appealing gaming chair illustration. Whether you’re a beginner or an experienced artist, these steps will help you master the art of drawing this iconic piece of gaming furniture.
Preparing Your Workspace and Materials
Before we dive into the step-by-step process of how to draw a gaming chair, it’s essential to set up your workspace and gather the necessary materials. Here’s what you’ll need:
1. Drawing paper or sketchbook
2. Pencils (HB and 2B recommended)
3. Eraser
4. Ruler
5. Fine-tipped black pen or marker (optional)
6. Colored pencils or markers (optional)
Once you have your materials ready, find a comfortable and well-lit space to work. A flat, stable surface is ideal for creating your gaming chair masterpiece.
Understanding the Basic Structure of a Gaming Chair

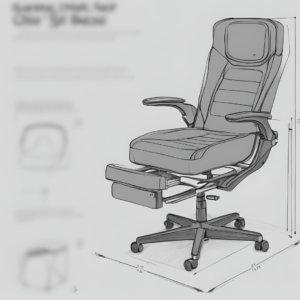
Firstly, it’s crucial to familiarize yourself with the basic components of a gaming chair before starting your drawing. Typical gaming chairs consist of the following parts:
1. Seat base
2. Backrest
3. Armrests
4. Headrest
5. Lumbar support cushion
6. Base with wheels
7. Gas lift mechanism
By breaking down the chair into these individual elements, you’ll find it easier to approach the drawing process systematically.
How to Draw a Gaming Chair Step by Step: The Basic Outline
Now, let’s begin with the step-by-step process of how to draw a gaming chair:
Step 1: Sketch the Seat Base
Start by drawing a rectangular shape for the seat base. Use light, loose strokes to create the initial outline. The seat should be slightly wider at the front than at the back to create perspective.
Step 2: Add the Backrest
Next, draw two vertical lines extending upward from the back corners of the seat base. These lines will form the sides of the backrest. Connect them at the top with a curved line to create the upper edge of the backrest.
Step 3: Shape the Armrests
On either side of the seat base, sketch the armrests. Begin with simple rectangular shapes, then refine them by adding curves to represent the padded areas.
Step 4: Incorporate the Headrest
At the top of the backrest, draw a smaller rectangular shape for the headrest. Curve the corners slightly to give it a more realistic appearance.
Step 5: Include the Lumbar Support Cushion
In the lower portion of the backrest, sketch an oval shape to represent the lumbar support cushion. This is a key feature in learning how to draw a gaming chair step by step, as it adds authenticity to your illustration.
Refining Your Gaming Chair Drawing

Now that you have the basic structure in place, it’s time to refine your drawing and add more detail:
Step 6: Enhance the Seat Base
Add depth to the seat base by drawing lines to indicate the edge of the cushion. Include subtle curves to suggest the plushness of the padding.
Step 7: Detail the Backrest
Draw vertical lines along the backrest to represent the segmented padding often found in gaming chairs. Add curves to these lines to give the impression of contouring around the body.
Step 8: Refine the Armrests
Enhance the armrests by adding details such as adjustment mechanisms and padding. Draw small circles or squares to represent buttons or levers for adjustability.
Step 9: Perfect the Headrest
Add stitching details around the edges of the headrest. You can also include a logo or design element typically found on gaming chairs.
Step 10: Texture the Lumbar Support Cushion
Add lines or a subtle pattern to the lumbar support cushion to give it texture and dimension.
Adding the Base and Mechanical Elements
To complete your gaming chair drawing, you’ll need to add the base and mechanical components:
Step 11: Sketch the Chair Base
Draw a five-pointed star shape beneath the seat to represent the base of the chair. Make sure the points of the star are evenly spaced.
Step 12: Add the Wheels
At each point of the star-shaped base, draw small circles to represent the wheels. Add inner circles to give them depth.
Step 13: Include the Gas Lift Mechanism
Draw a cylindrical shape connecting the center of the base to the underside of the seat. This represents the gas lift mechanism that allows height adjustment.
Final Touches and Detailing

Now that you’ve learned how to draw a gaming chair step by step, it’s time to add the finishing touches:
Step 14: Enhance with Shading
Use your pencil to add shading to your drawing. Pay attention to where light would naturally fall on the chair and create shadows accordingly. This will give your drawing depth and dimensionality.
Step 15: Add Stitching and Seams
Include details like stitching along the edges of the seat, backrest, and armrests. This will make your gaming chair drawing look more realistic and professional.
Step 16: Incorporate Branding Elements
Many gaming chairs feature logos or brand names. Add these details to your drawing to give it an authentic look. You can create your own imaginary brand or recreate a well-known gaming chair logo.
Step 17: Refine Lines and Erase Guidelines
Go over your final lines with a darker pencil or fine-tipped pen to make them stand out. Carefully erase any remaining guidelines or rough sketches.
Coloring Your Gaming Chair Drawing (Optional)
If you want to take your illustration to the next level, consider adding color:
Step 18: Choose Your Color Scheme
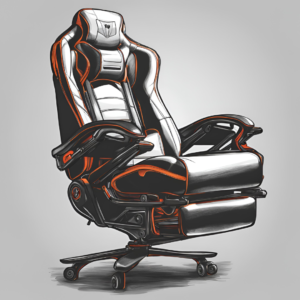
Decide on a color scheme for your gaming chair. Many gaming chairs feature bold colors or two-tone designs. Popular color combinations include black and red, white and blue, or all-black with colored accents.
Step 19: Apply Base Colors
Using colored pencils or markers, apply the base colors to your drawing. Start with lighter shades and gradually build up to darker tones.
Step 20: Add Highlights and Shadows
Enhance the dimensional effect by adding highlights to areas where light would reflect off the chair’s surface. Deepen shadows in areas that would naturally be darker.
Tips for Mastering How to Draw a Gaming Chair Step by Step

As you practice and refine your skills in drawing gaming chairs, keep these tips in mind:
1. Study real gaming chairs: Observe actual gaming chairs or high-quality photographs to understand their proportions and details better.
2. Practice perspective: Gaming chairs often have complex curves and angles. Practice drawing from different viewpoints to improve your perspective skills.
3. Pay attention to materials: Different materials reflect light differently. Try to capture the look of leather, mesh, or fabric in your drawings.
4. Experiment with different styles: While this guide focuses on a realistic approach, don’t be afraid to explore more stylized or cartoonish representations of gaming chairs.
5. Use reference images: It’s perfectly acceptable to use reference images when learning how to draw a gaming chair step by step. As you gain confidence, try drawing from memory or imagination.
Conclusion: Mastering the Art of Drawing Gaming Chairs
In conclusion, learning how to draw a gaming chair step by step is a rewarding process that combines observation, technical skill, and creativity. By following this comprehensive guide and practicing regularly, you’ll soon be able to create impressive illustrations of gaming chairs with ease.
Remember that every artist’s journey is unique, and it’s okay if your first attempts don’t look perfect. The key is to keep practicing and refining your technique. With time and patience, you’ll develop your own style and be able to draw gaming chairs that capture both the functionality and the excitement of gaming culture.
Whether you’re creating concept art for a game, designing your dream gaming setup, or simply enjoying the art of drawing, mastering how to draw a gaming chair step by step is a valuable skill that can enhance your artistic repertoire. So grab your pencil, get comfortable, and start bringing your gaming chair visions to life on paper!
